Opsgenieログ
Opsgenieは単一コンソールでアラート管理を行うインシデント管理プラットフォームです。Opsgenieでアラートが作成されると、これらアラートをSite24x7アプリケーションログに転送することができます。これにより監視を作成して単一コンソールのダッシュボードで分析できます。
OpsgenieとSite24x7アプリケーションログの連携について
必要条件
OpsgenieとSite24x7アプリケーションログの連携には、Webhookの使用のために有料版を利用している必要があります。
目次
ログタイプの作成
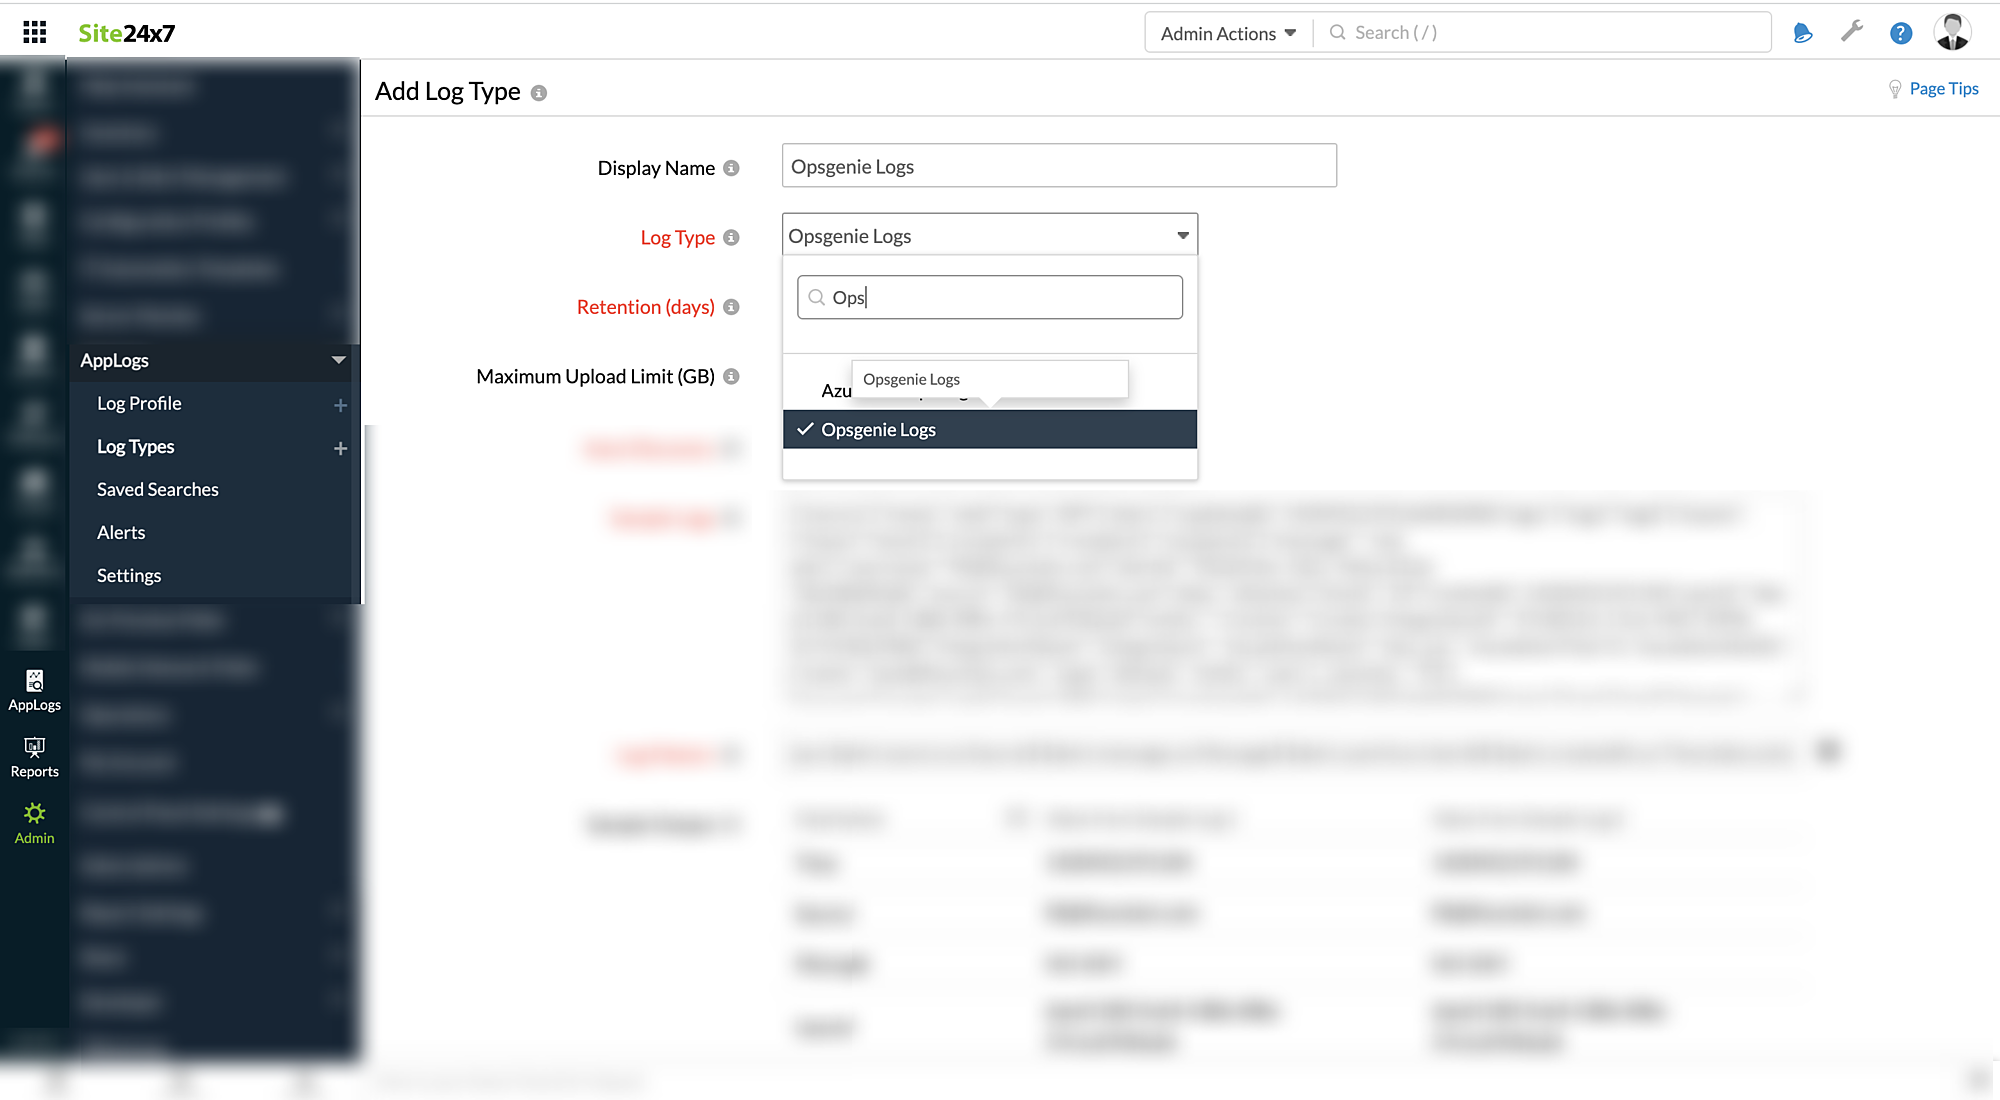
- Site24x7アカウントにログインし、管理 > アプリケーションログ > ログタイプの追加の順にクリックします。
- 表示名を入力します。
- ログタイプのドロップダウンからOpsgenieを選択します。

- Enter the 保存期間と最大アップロード制限については各ページを参照してください。
- デフォルトで、次のログパターンがOpsgenieログで適用されます。
ログパターン:
jjson $alert.source as Source$ $alert.message as Message$ $alert.userId as UserId$ $alert.createdAt as Time:date:unixm$ $alert.tinyId as TinyId$ $alert.alias as Alias$ $alert.alertId as AlertId$ $alert.entity as Entity$ $alert.username as Username$ $integrationName as IntegrationName$ $action as Action$ $integrationId as IntegrationId$ $source.name as SourceName$ $source.type as SourceType$ $alert.tags as Tag:string-array$ $alert.teams as Teams:string-array$ $alert.recipients as Recipients:string-array$ $escalationName as EscalationName$ $escalationTime as EscalationTime:number$ $escalationNotify.name as EscalationNotifyName$ $priority as Priority$
サンプルログ:
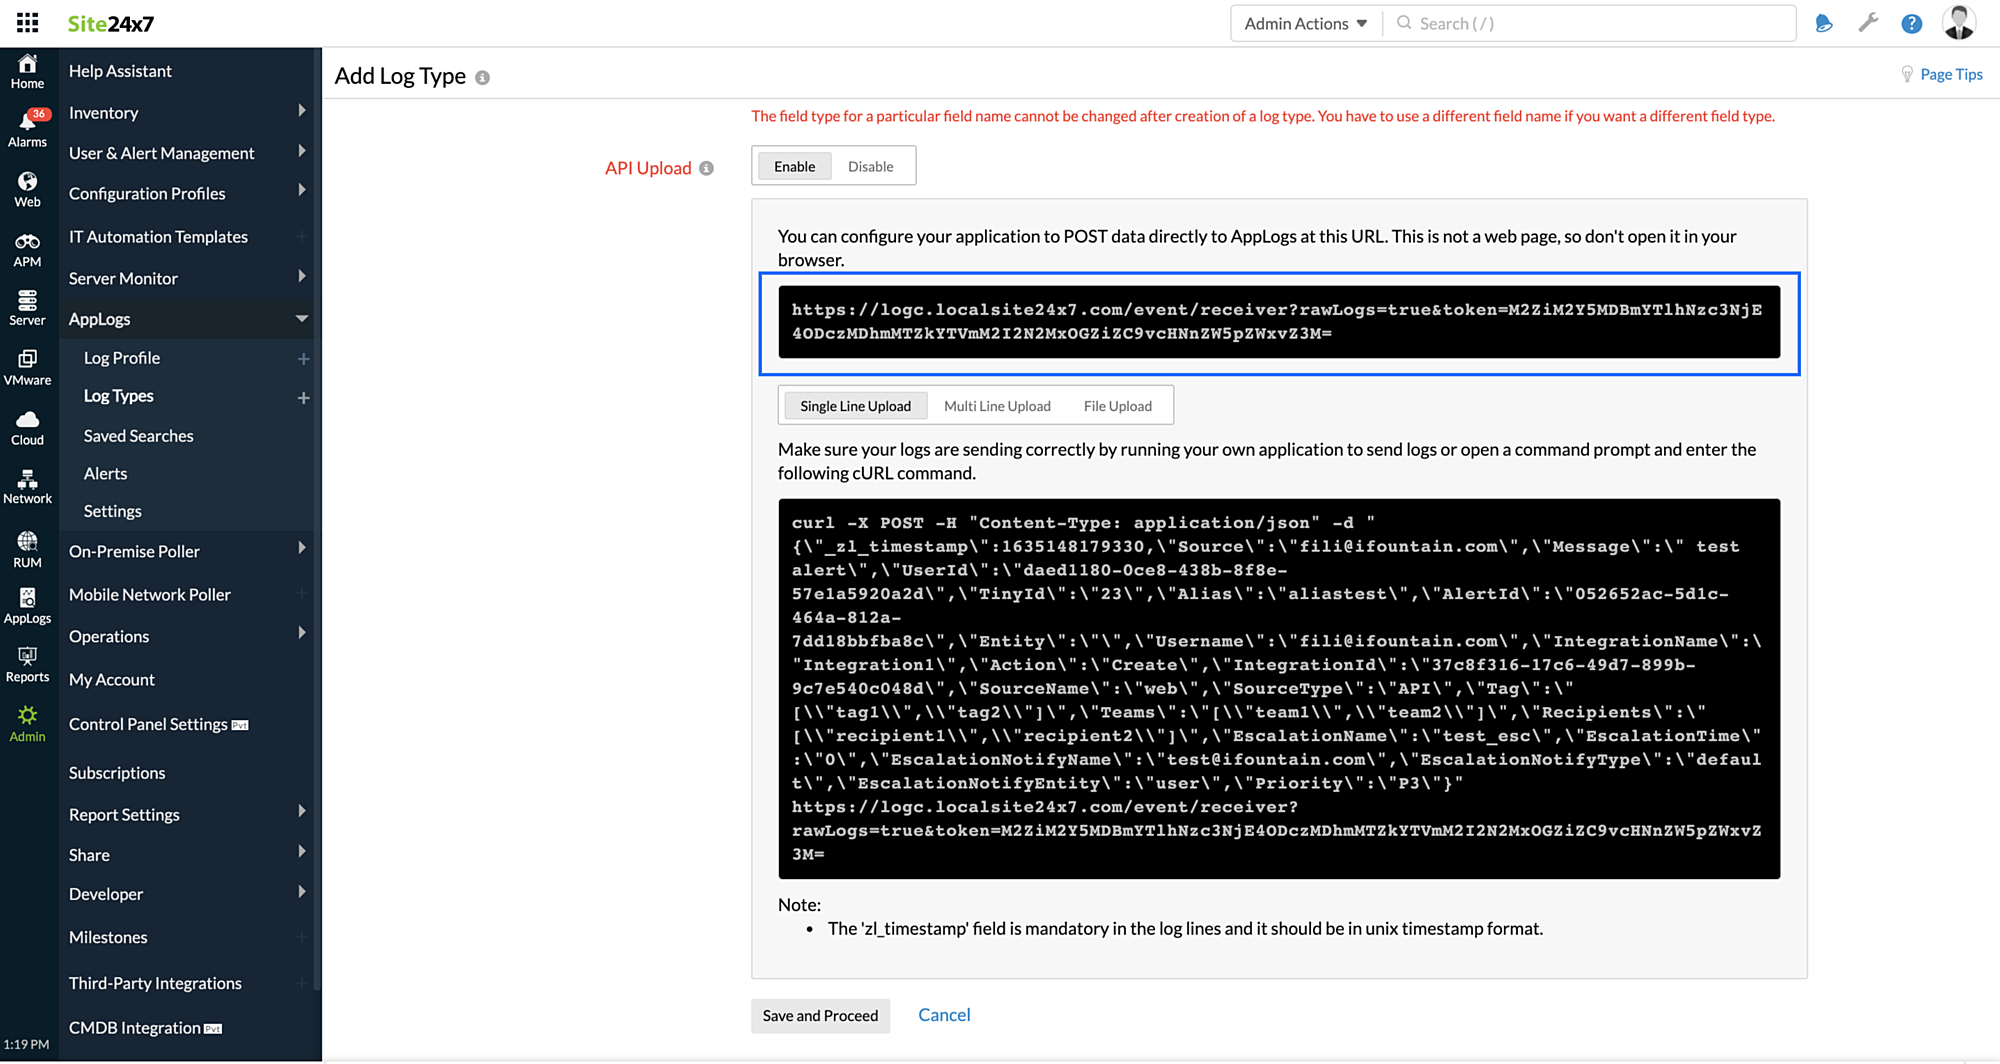
{"source":{"name":"web","type":"API"},"alert":{"updatedAt":1420452193166002000,"tags":["tag1","tag2"],"teams":["team1","team2"],"recipients":["recipient1","recipient2"],"message":" test alert","username":"fili@ifountain.com","alertId":"052652ac-5d1c-464a-812a-7dd18bbfba8c","source":"fili@ifountain.com","alias":"aliastest","tinyId":"23","createdAt":1420452191104,"userId":"daed1180-0ce8-438b-8f8e-57e1a5920a2d","entity":""},"action":"Create","integrationId":"37c8f316-17c6-49d7-899b-9c7e540c048d","integrationName":"Integration1", "escalationName":"test_esc", "escalationTime":0, "escalationNotify": {"name":"test@ifountain.com"}, "priority": "P3"} - 次のスクリーンショットの青枠部分のAPIエンドポイントURLをコピーしてください。

- 保存をクリックします。
OpsgenieとSite24x7アプリケーションログの連携
こちらのドキュメントを参照して、両サービスを連携してください。
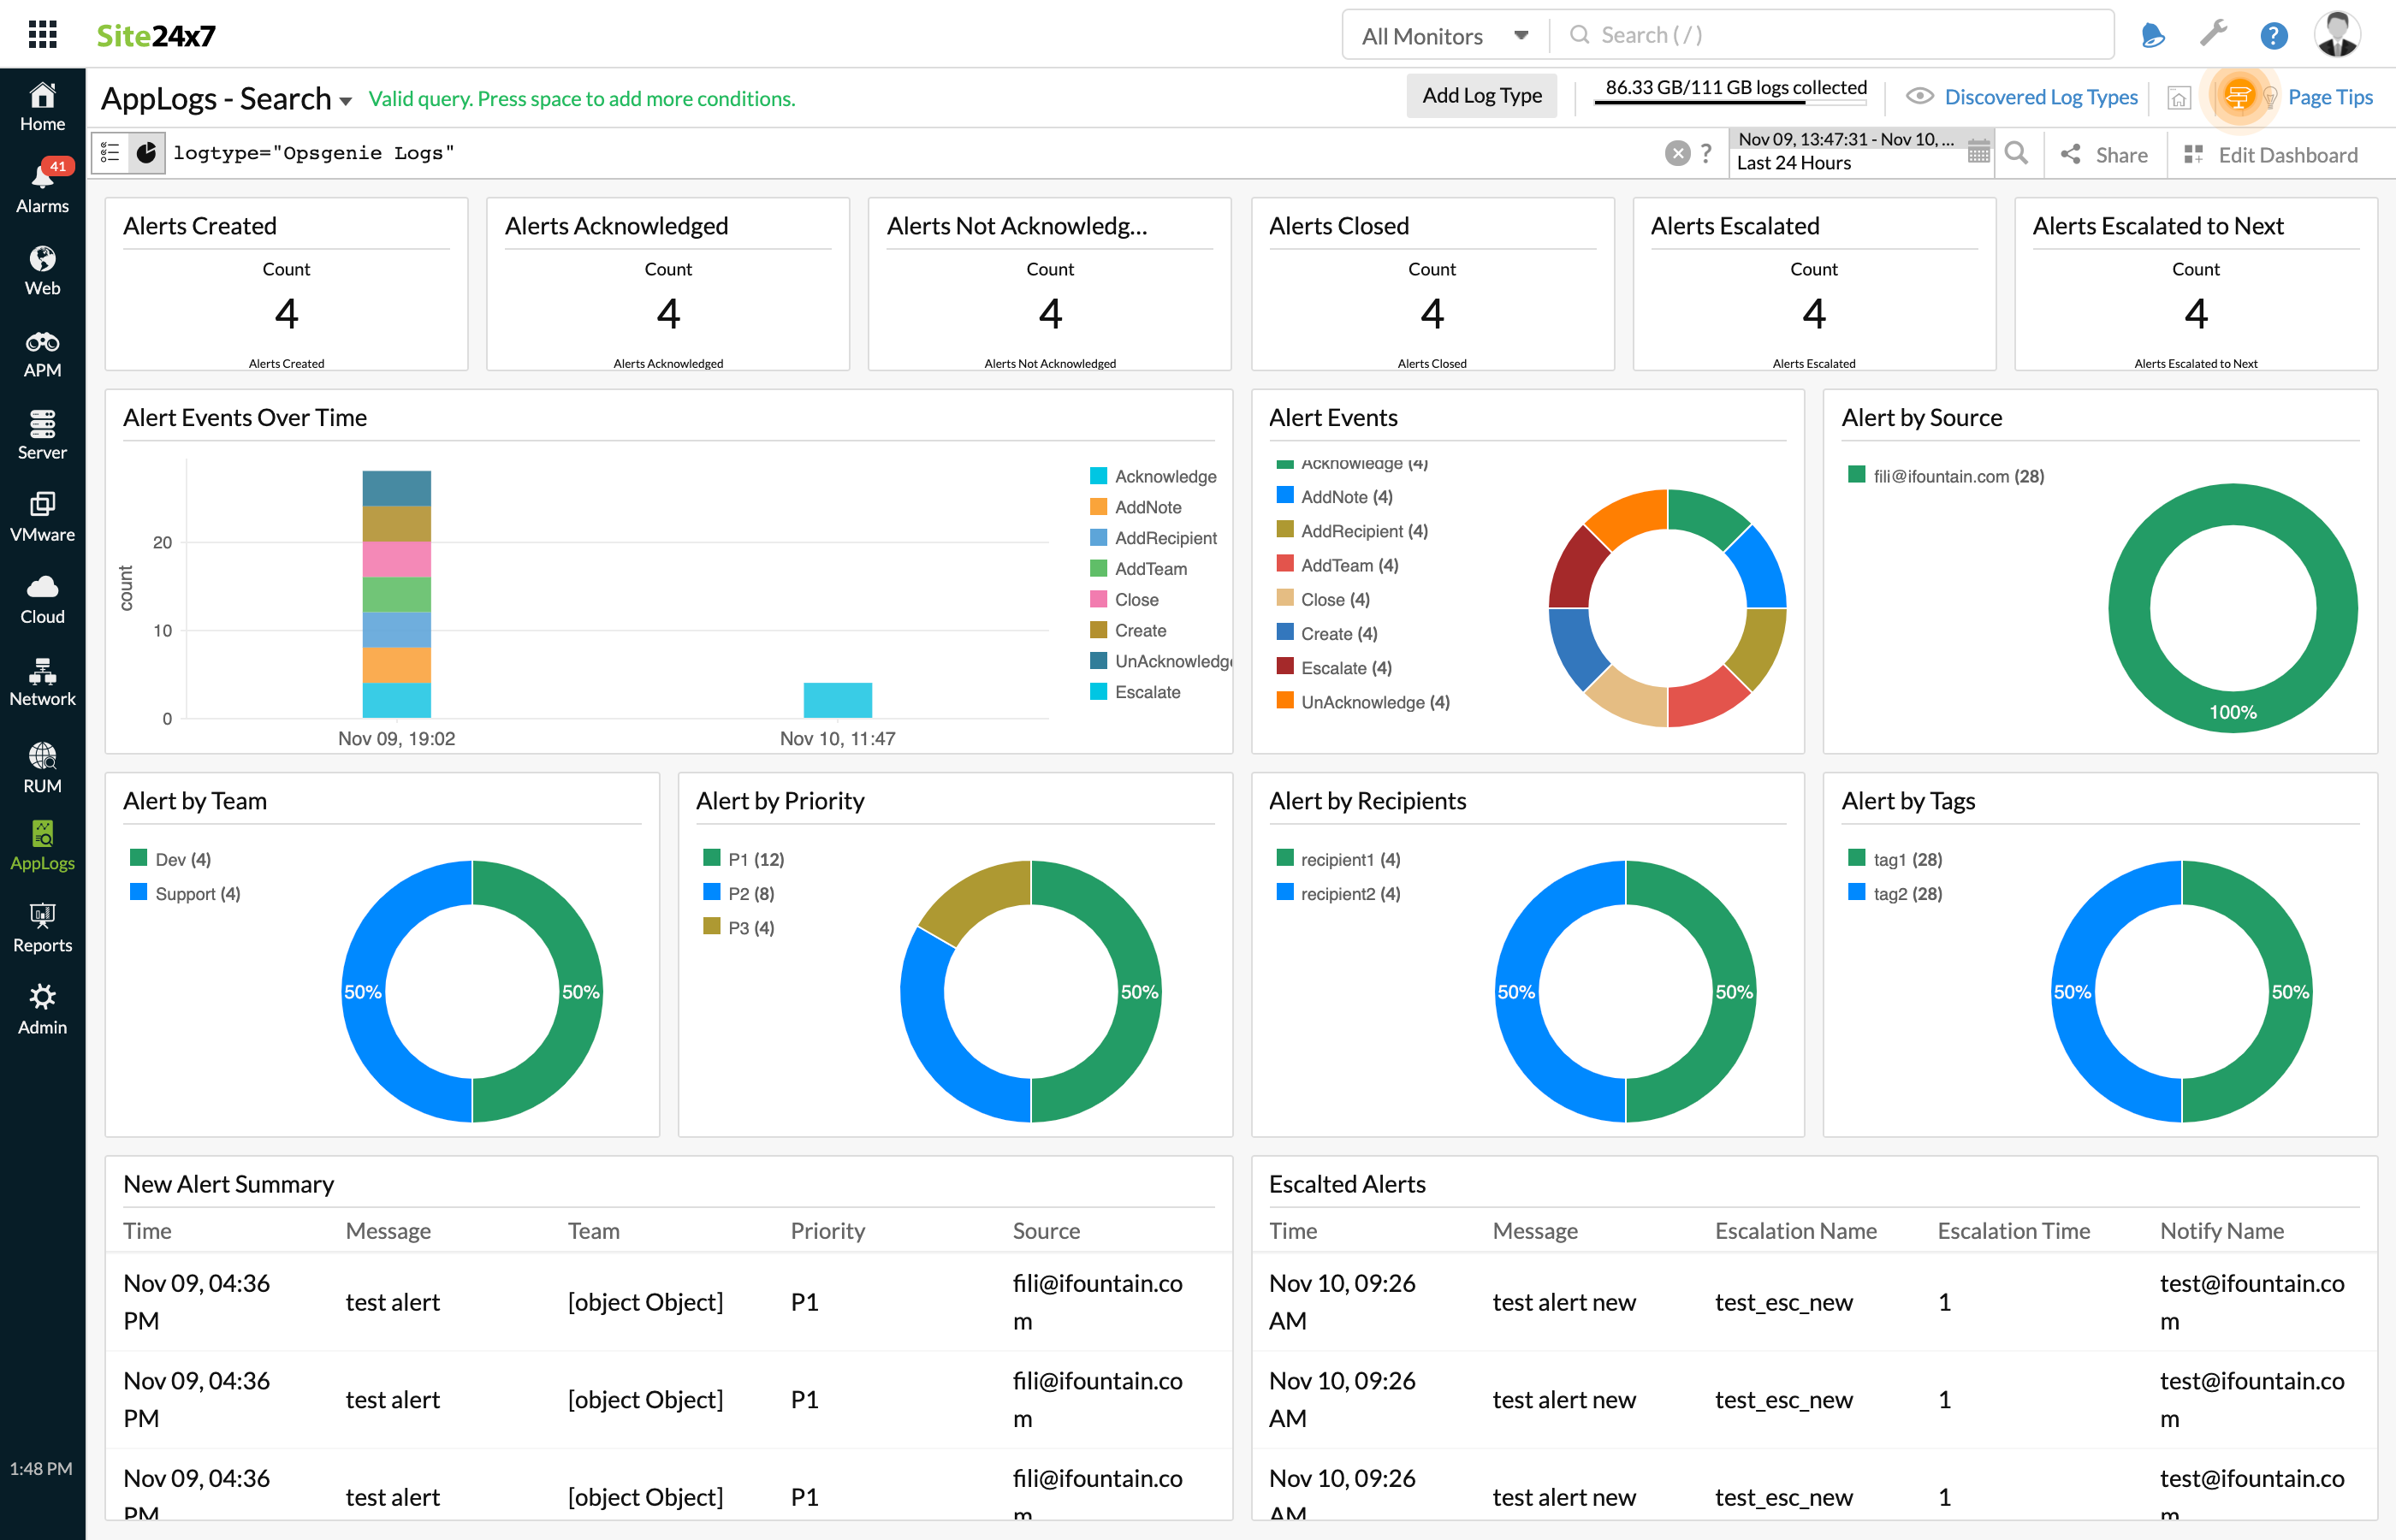
データの表示
- Site24x7アカウントにログインし、アプリケーションログをクリックします。
- ログタイプでOpsgenieログを選択します。
